WARNING: I DO NOT recommend or advocate anyone do this the way I did.
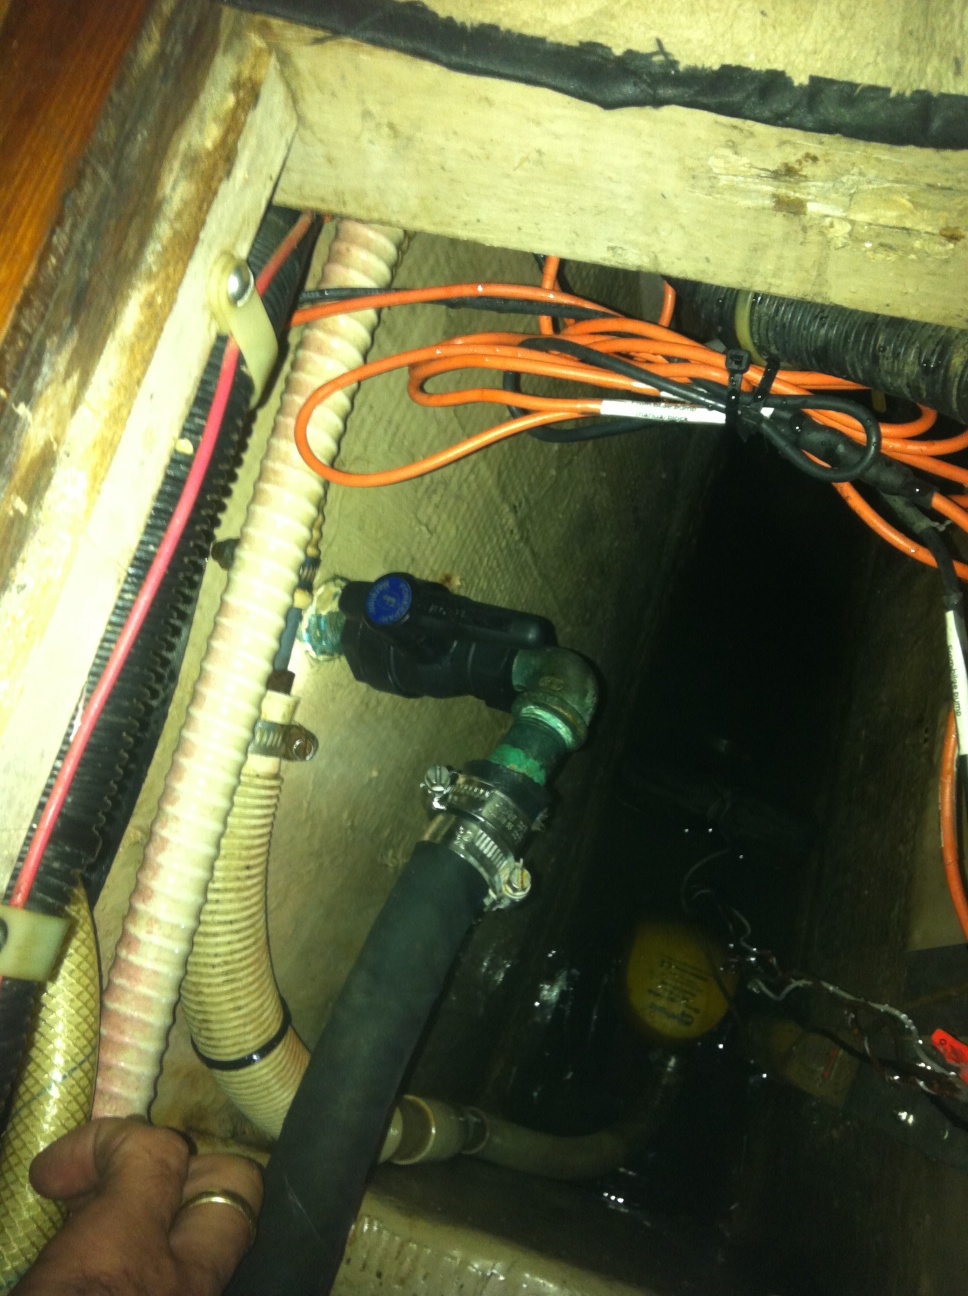
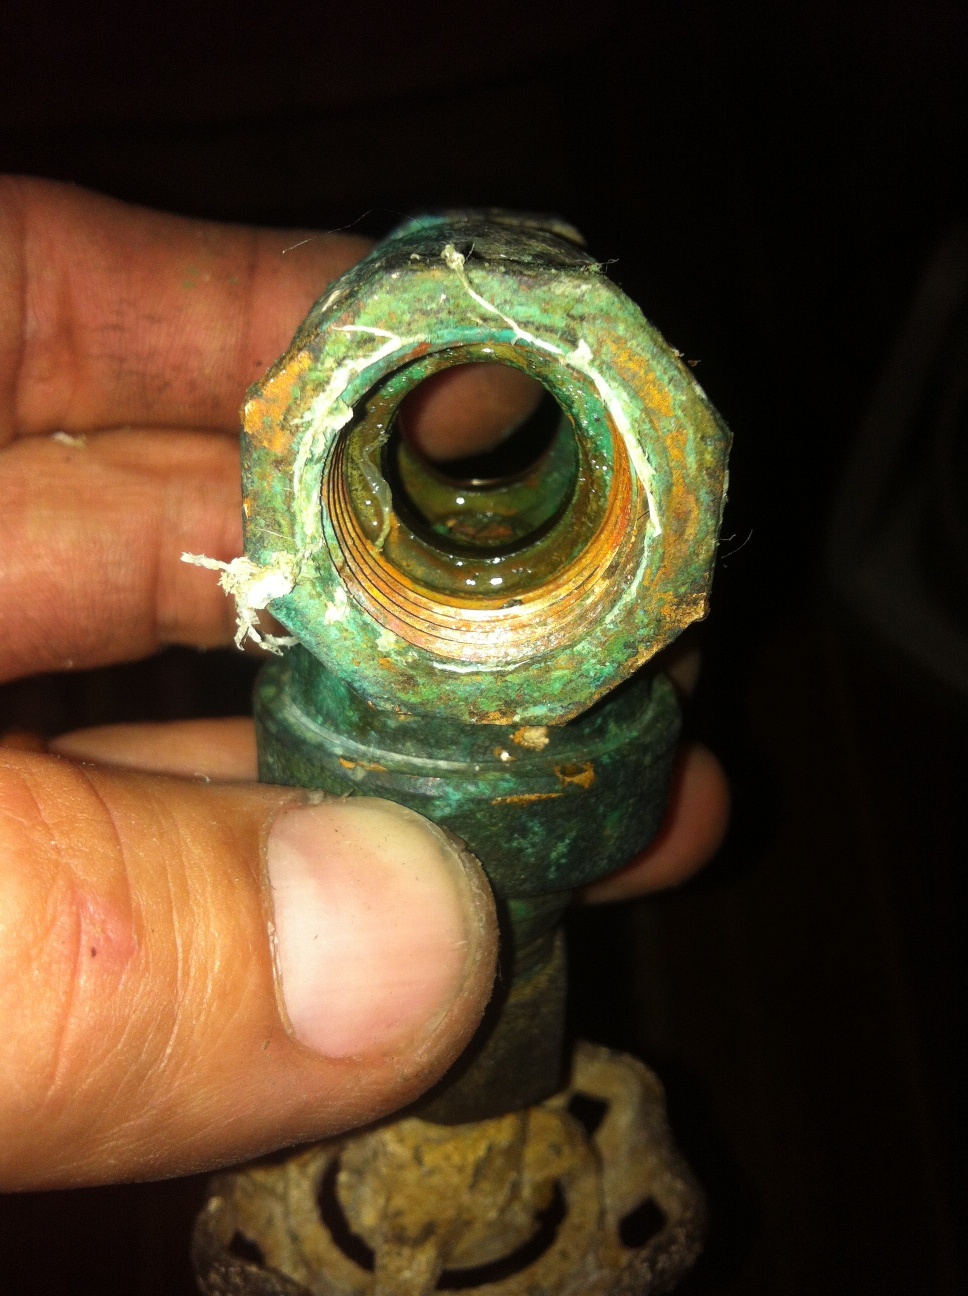
The engine raw water intake seacock was a Big Box Home Improvement store gate valve. Why? Why? Why? And again why?!?!? What possesses people to go to these places and buy these valves for use on boats? The one on Emet was beyond non-functional. I could tell that the gate was completely gone as were the valve stem threads. Turning the valve handle did nothing.
Normally, one would haul out, remove the old valve, and then install a new valve. Problem with that scenario is that a haul out is around $200. I can’t work on the boat while it’s in the lift and furthermore, no place around here allows anyone to work on their own boats. So, to replace this measly $35 valve, it would have cost me around $500 or $600 dollars. I decided to pass and do it myself . . . with Emet IN the water.
First, I got ready two of the smallest wooden cone plugs that I had.
The second thing was to make sure that the old valve to be replaced could be unscrewed from the thru-hull. I took a wrench and ever so easily applied force to see if the valve would turn. I was careful to make sure that the thru-hull wasn’t turning. It has been painted over and if it began to turn, I would have seen cracks start in the paint. Fortunately, the valve turned easily.
Next, I removed the hose clamps from the hose where it attached to the valve or more specifically, the pipe that was attached to the elbow attached to the valve.
I had to use a heat gun to soften the rubber hose so that I could remove it. I got it loose and to the point where it was just about to come off the pipe. I got one of the cone plugs ready, making sure it was within easy reach. I pulled the hose off and immediately plugged the pipe with my thumb. I grabbed the cone with the free hand and then quickly inserted it into the pipe.
I next began to remove the valve. I turned it slowly until it was engaged on the thru-hull by only a thread or so and then very slowly turned it until it came off. I immediately plugged the thru-hull with my thumb, grabbed the other cone, and inserted it into the thru-hull.
Now it was just a matter of installing the new seacock and then reassembling everything.
I purchased a Forespar Marelon seacock from Defender to use in the application. It has 1/2″ NPSM threads which mate up to the 1/2″ NPSM threaded thru-hull. Plus, it won’t corrode.
I applied some Teflon tape to the thru-hull, closed the new seacock, pulled the cone, and quickly screwed the seacock on the thru-hull. Voila! Now it was just a matter of reassembling everything. I did replace some “All 300 Stainless” hose clamps with AWAB 316 stainless hose clamps. One of the hose clamps I was able to simply pull off. It had corroded that much.