
We recently acquired a 1986 Evinrude E10CRB 9.9 outboard for our 9’3″ dinghy. The first day we got her, she was running like a champ. She didn’t stay running when throttled ALL the way down, but that’s a small matter (which I have yet to remedy) – I just don’t throttle her all the way down. She continued to run fine for the next 2 short trips into Clear Lake. She easily gets the dinghy on plane with both Jodi and I aboard.
Wednesday evening I decided to fire her up, to give her a little exercise, and to keep her running. Everything was going fine and she was humming like a maddened bumble bee . . . until she wasn’t. One second she was motoring along and the next she was just sitting there, staring at me . . . silent. Dead in the water, she wouldn’t start AND the starter rope broke on me while attempting to get her going. Out came the oars and I rowed the mile or so back to Emet.
Once at the boat, I fixed the starter rope and attempted to get her running. She would finally start and run, but only while fully choked. My diagnosis was that the low speed carburetor circuit was plugged . . . agreeing with multiple other dock dwellers that happened to be out, watching our plight, and offering their own judgements of the problem.
Friday afternoon I decided it was time to remove the carb and see what I could do. I’m certainly no expert in small engine, or any engine for that matter, repair, but with a little ingenuity and the service manual, I figured I could muddle through. I ordered the carburetor rebuild kit, but it would be several days before it arrived. I reckoned that I could disassemble, clean, and have the carb ready for the arrival of the rebuild kit to expedite the re-installation and testing once the kit did arrive.
Taking the carburetor out is, and was, pretty easy. Remove the air breather assembly. Remove the choke lever. The starter assembly is held in by 1 bolt. Loosen it all the way, carefully hold the whole assembly together, screw on a 3/8-16 nut to the bolt to hold it all together, and then move the starter assembly out of the way. Remove the throttle cam assembly screw and the slide the link out of the throttle lever on the carburetor. Disconnect the fuel line from the carburetor. Remove the two nuts that hold the carburetor to the power head. Voila! The carburetor is out.
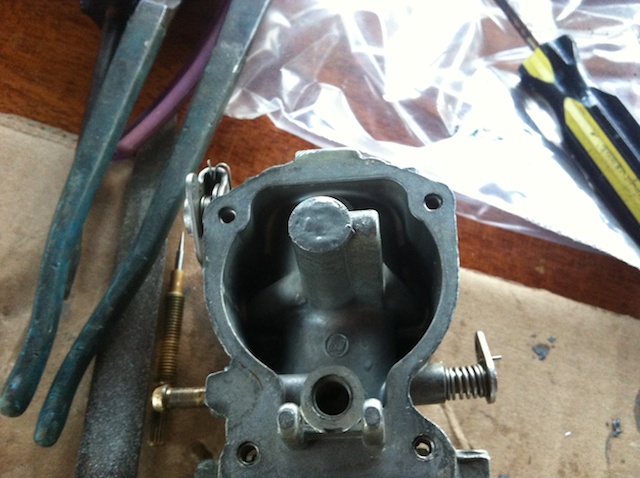
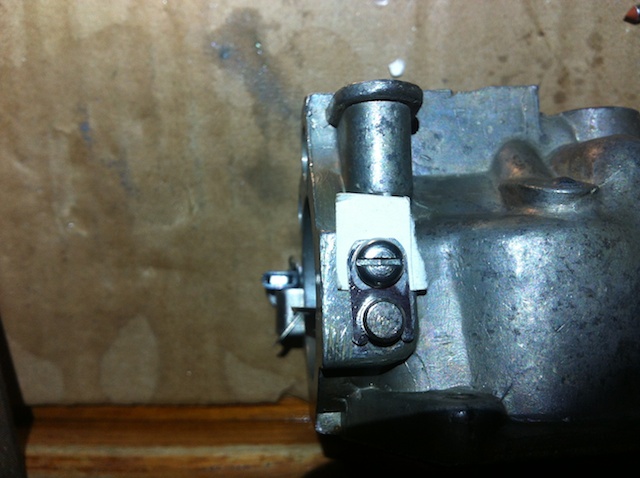
This is what she looked like. I had just removed the float bowl, float, began removing the choke, and then decided to document this fiasco. (I fully expected to wind up with an engine that either wouldn’t start or ran worse than before I began.)
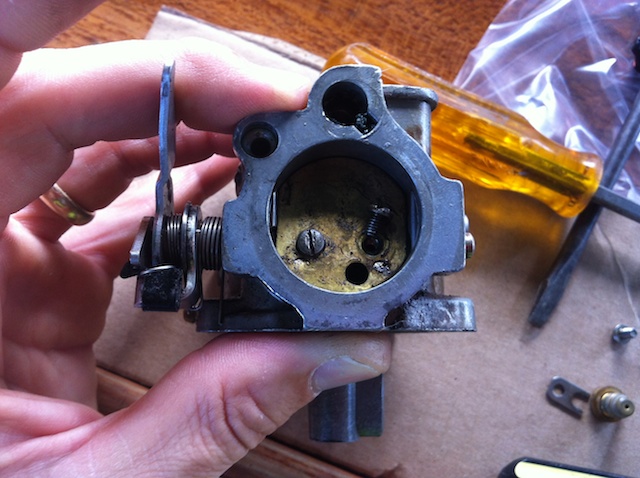
The carb was pretty filthy and you can see in the pic below that the hole at the top center has some crud in it.
That hole in the center with all the crud is the low speed idle valve port. I believe it was through that port that some of that crud got sucked in and plugged/blocked something.
I bought some Berryman carb and choke cleaner to clean everything up real good.
The carburetor comes apart pretty easily. There are a few pieces that PICTURES are super helpful when reassembling. Take pics, because, I don’t care who you are, your memory will fail you and you won’t recall how it goes back together. Was that hole on the right or left when the choke plate was installed? Little things like that. Seems easy enough to remember, but once all those pieces are off and sitting in a bowl, you won’t remember EXACTLY how they went back on.
The float bowl comes off with the removal of four screws. No issues there.
The float is held on with a plastic pin that pushes right out.
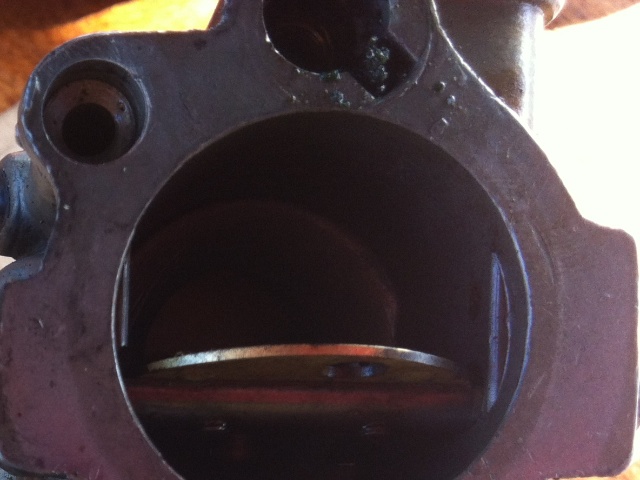
Unless there is an operational problem, there is no need to remove the throttle plate or any of its assembly.
The choke has a small plate that is held on with a single screw. Probably no reason to remove the choke unless there is a problem, but I had already begun and continued on. In the lower right of the very first post pic, you can see a small piece that has a hole in the top and a U at the bottom. That’s the piece that holds the choke rod in place. To remove the rod, there is a small black piece of plastic that secures one of the return springs. This has to be removed so that the choke rod can slide out.
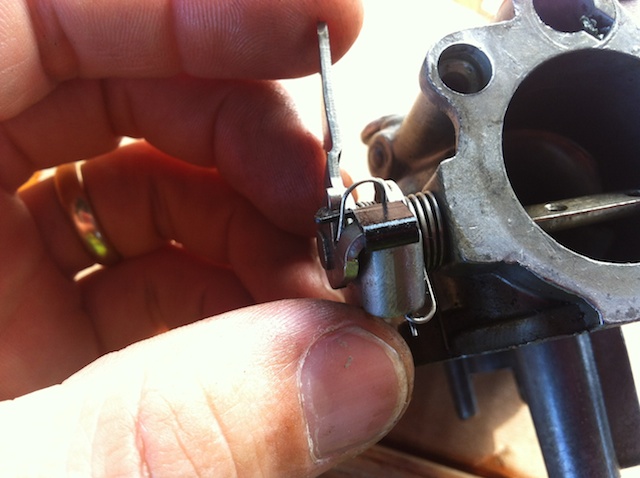
Removing that piece of plastic is kind of tricky. Tricky in that the little tail piece that holds the spring I’m sure has a tendency to break off. I was very careful when removing and reattaching it. Getting it back together was a Chinese finger trap kind of task. I just didn’t force that little nip too much and she went back together pretty easily.
At the bottom of the carburetor there is a stem that sticks out. The float goes around it. In the first pic, it is the stem that is extending downward past my thumb. On this stem is the high speed orifice. There are at least two different versions of the carburetor having two different types of high speed orifices. In hind sight, my version has the high speed orifice on the side. It’s just a brass screw that has a hole all the way through it. In the manual, it says to remove the “plug” at the end of that stem. Here’s what I have at the end:
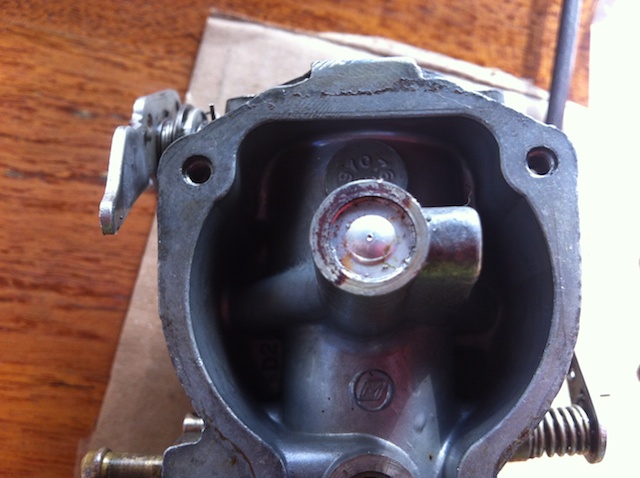
A pressed in aluminum disc. Well, the manual wouldn’t steer me wrong. It says to remove it, so I did expecting to see something else. This was a chore and I’m sure there are a billion different ways to do it. Some better than my approach, some worse. I used a utility knife to “drill” a hole in the center and then used a small screwdriver to pry it out. Anything else in there? NOPE. Just a long hole into the center of the carburetor. Depressing . . . because I didn’t (and don’t) have a new disc and I doubt that a replacement is even available.
There’s also a disc at the top of the carburetor. This disc supposedly comes in the rebuild kit and DOES need to be removed. It allows access to the three small holes that are in the top center of the carburetor.
There is some lead shot pressed into ports in several spots at the top of the carburetor. I didn’t remove any of these as my carb wasn’t really gummed up too much. I would have removed them if my carb had been really gummed. These allow better access into the low speed circuits.
Once I had the carb disassembled to the degree that I was willing to disassemble it, I used the spray straw to spray carb cleaner into every accessible hole. I had a clean towel underneath the carb while doing this so I could tell if any debris came out. Sure enough, a few fairly large chunks of detriment came out with the carb cleaner when sprayed into a few of the circuits.
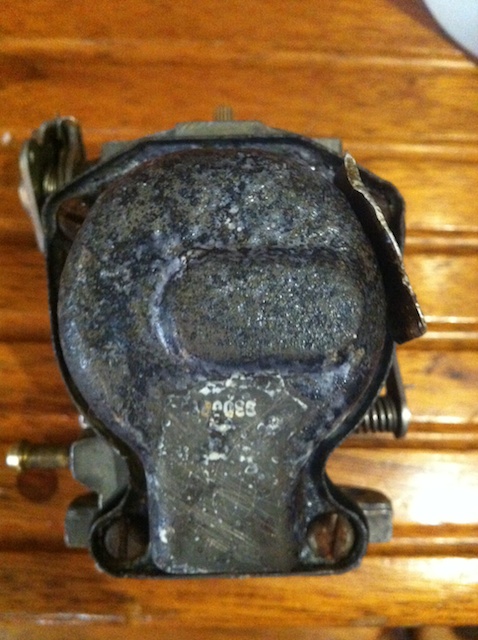
I cleaned everything up real good and then proceeded to reassemble the carb. My first order of business was to figure out some way to either fix those aluminum discs are replace them. I decided to fix them. I filed them smooth and then used the good ‘ole standby JB Weld.
For the high speed orifice stem, I put the filed smooth plug back in and then applied JB weld over the entire bottom to completely seal it off.
The trick here was to make sure that I didn’t get any JB weld INTO the inside of that stem plugging or restricting the high speed circuit.
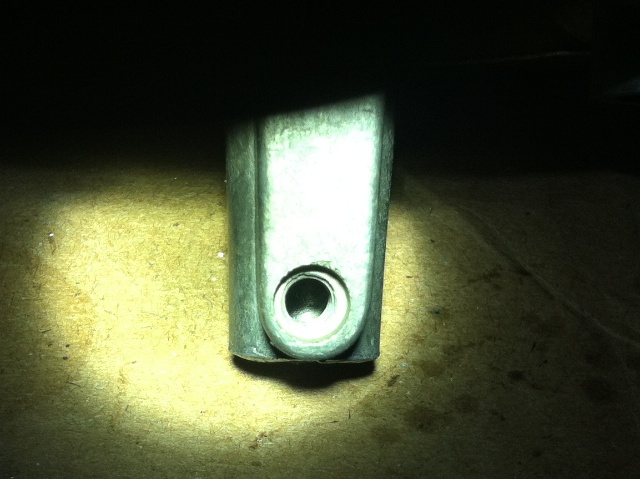
It was clear all the way through. This screw hole is where the high speed orifice plug screws into my carburetor.
Next I applied some JB Weld to the aluminum disc that goes on the top of the carb.
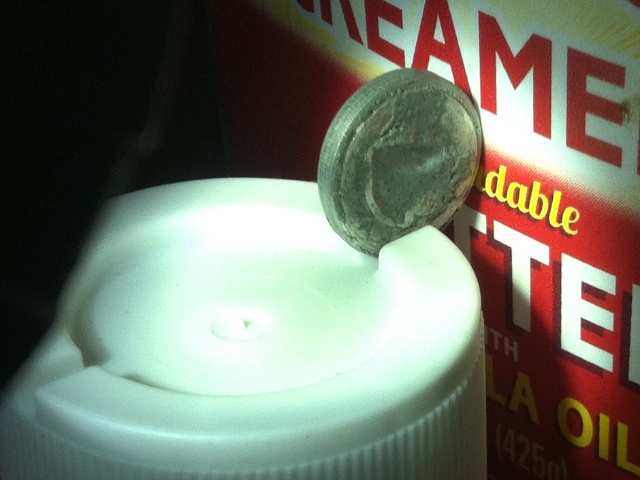
I made sure that the edges and that little lip was clean so that it would fit nicely back into the carb. That’s the cap from the carb cleaner that served as a handy holder for the disc.
The only issue that I ran into while reassembling everything was the goofy choke. Should be a simple thing to install. But, it wasn’t Once the screw was torqued down, the rod holding plate somehow got compressed against the rod and wouldn’t allow the choke to turn. I tried all manner of alignments, smoothing the plate, flipping the plate, making sure the plate was flat, offsetting the plate to one side or the other while tightening, filing the plate, slightly bending the ends of the U, nothing worked. I finally resorted to putting a small piece of cardboard from the JB Weld box under the plate where the screw secures it.
I then used a utility knife to trim all the excess off. Problem solved the choke worked smoothly. No idea why it wouldn’t work without this “spacer” as it didn’t have a spacer when I took it off.
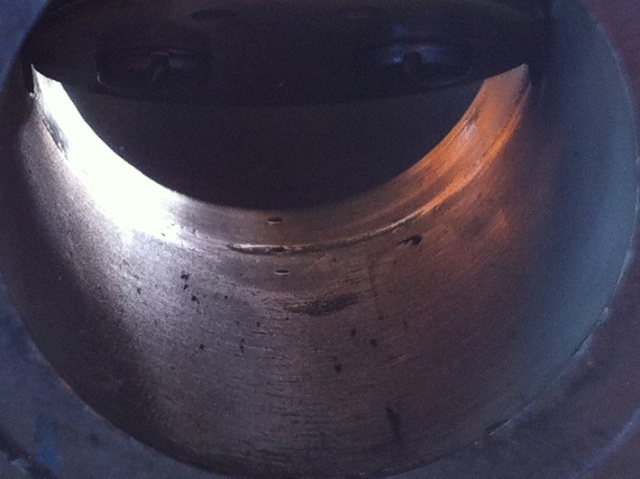
I also have the carburetor version where the float bowl is metal. Apparently in 1987, they switched to plastic. It was rusted a little.
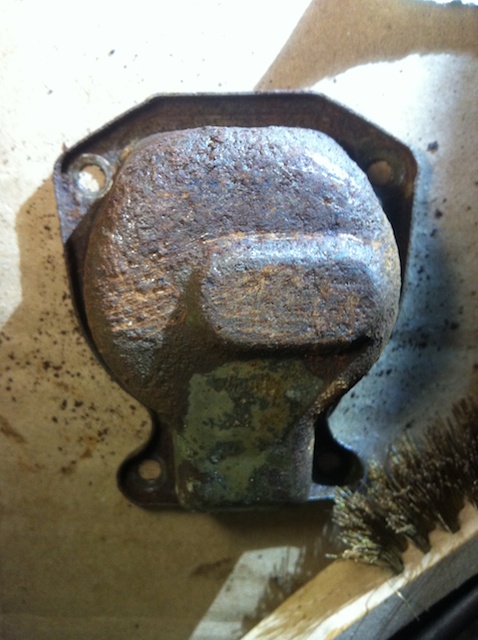
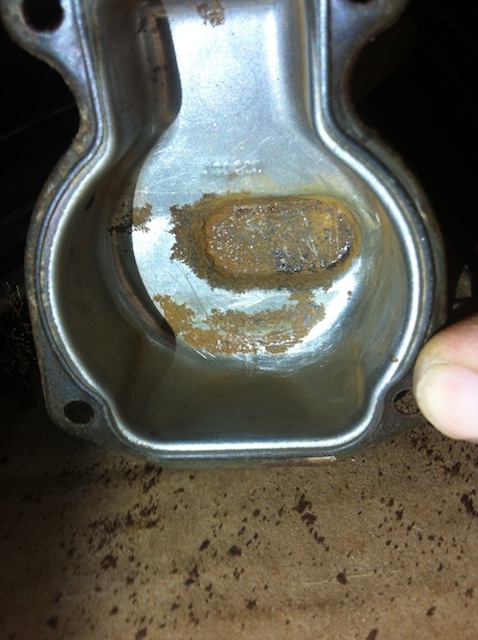
A wire brush and a slotted screwdriver were used to scrape and clean off all the rust. I then used some 200 grit sand paper to sand a little more rust off. I cleaned it real good and then applied a liberal coat of Ospho to treat all the rust. It was left overnight and this is what it looked like in the morning.
All the reddish orange rust was black.
There was one last issue to resolve before I could reattach the carburetor and see if my efforts worked. The low speed valve is supposed to have a bushing on it that prevents air from getting sucked in around the threads. The carb didn’t have one when I disassembled it and as I don’t have the kit yet, I didn’t have this. So, a makeshift remedy was devised. I used some Teflon tape to make a bushing at the end that would hopefully seal off the air.
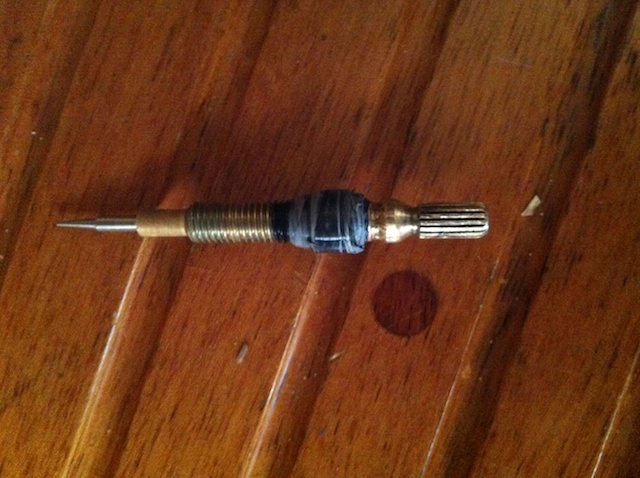
I screwed it in until lightly seated and then backed it out one turn. That’s supposedly the “starting” point for adjusting the idle speed.
I put the carb back in the motor, dropped it onto the back of the dinghy and . . . she fired up on the third pull. I had to adjust the idle speed valve about 1/8 of a turn. I couldn’t believe it. She was running fine (apart from the fact that I still can’t turn the throttle ALL the way down and have her keep running). I took her out for a spin and success. She seemed to be running great.
This repair took a total of about 8 hours.